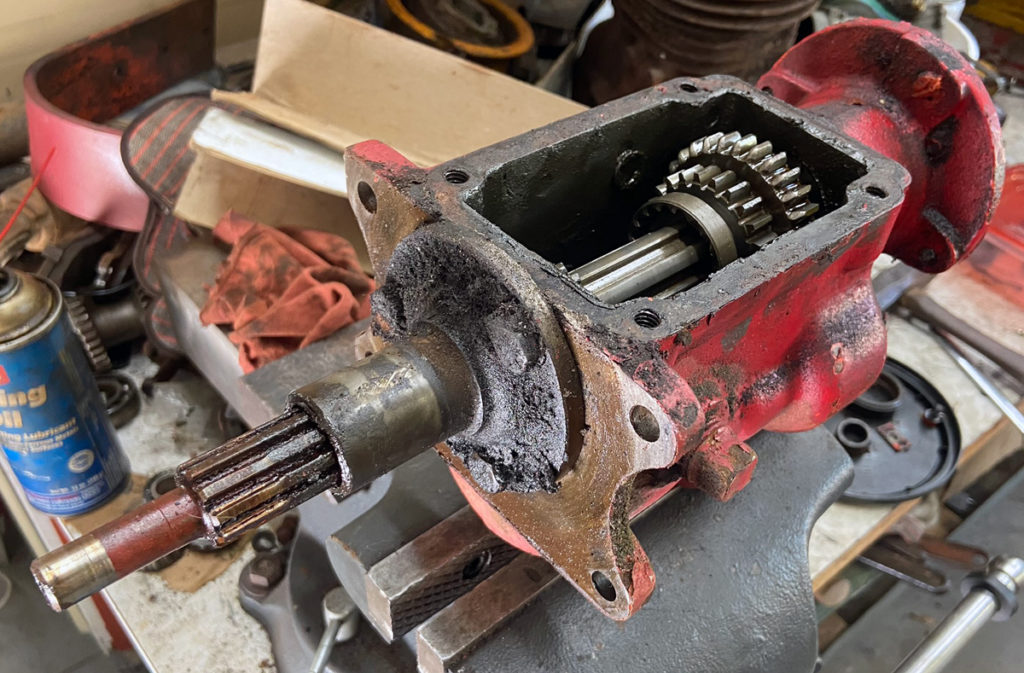
So you have a Borg-Warner 3-speed transmission to overhaul or rebuild? Okey dokey, let’s get started.
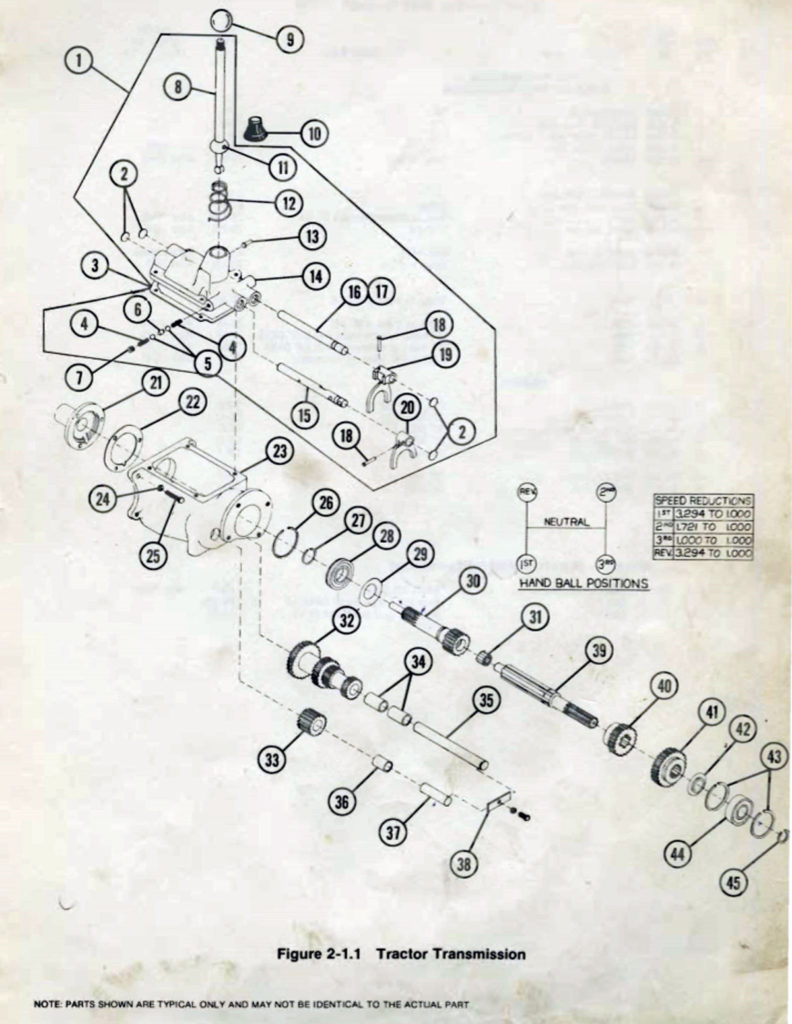
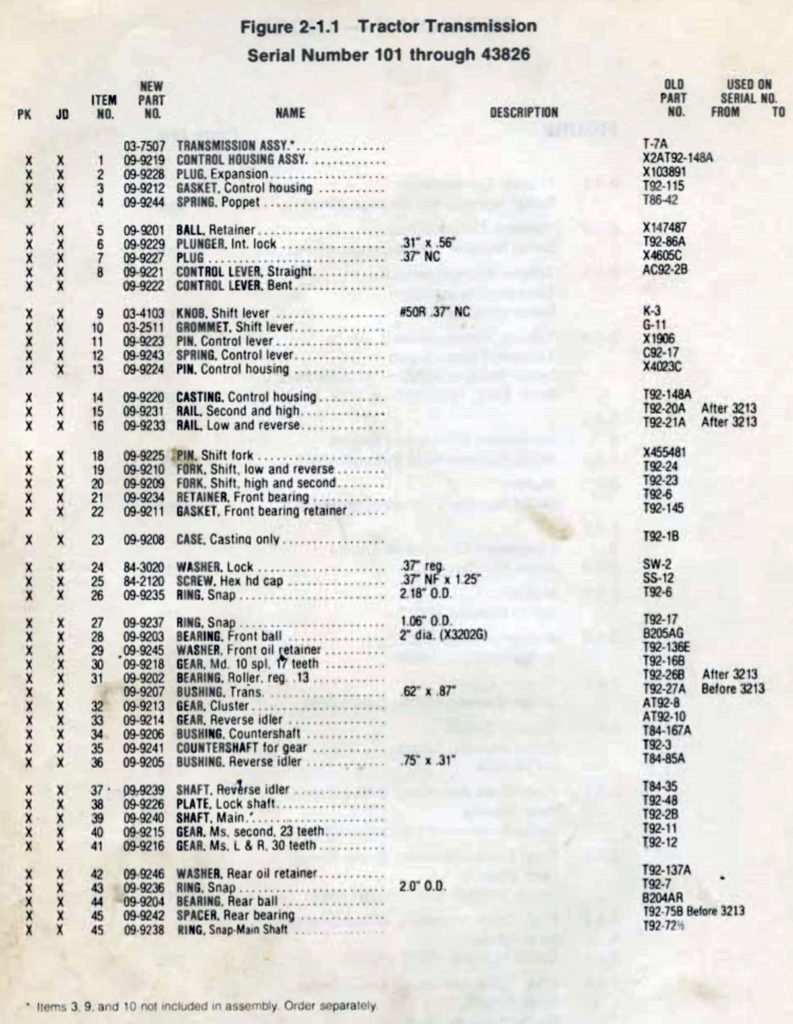
Here’s an IPL, or illustrated parts list from the EPCO Master Parts Manual.
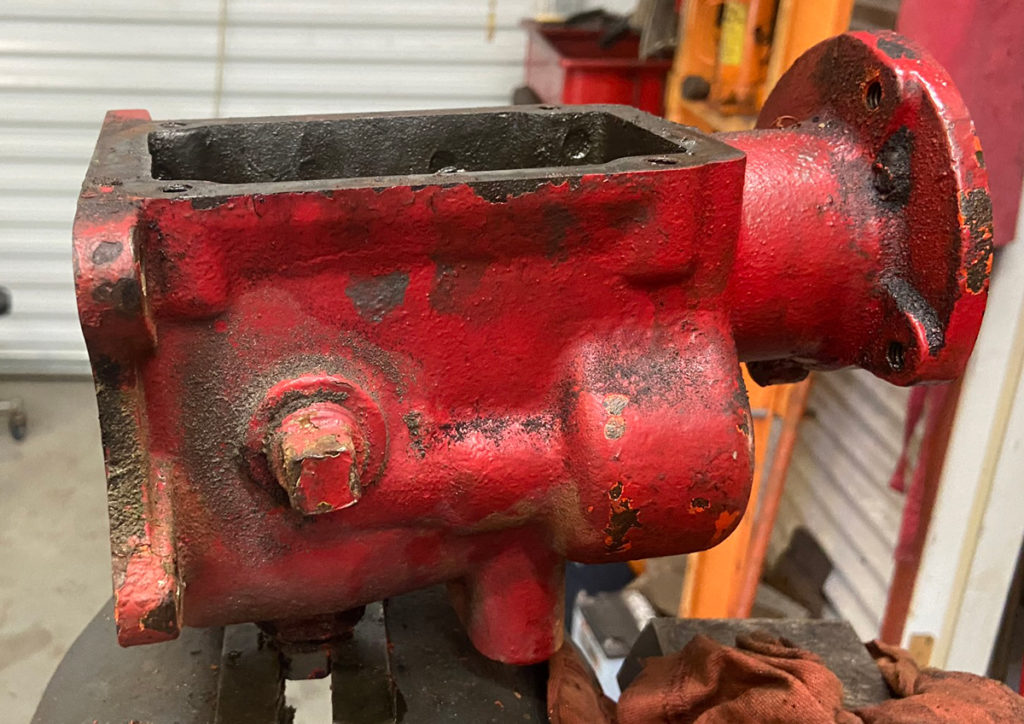
Drain the lube out by removing the square-head drain plug on the bottom and allowing the gunk (um, I mean “old lube”) to drain, then stabilize the transmission for the work. The best way I’ve found to hold the case is to replace the drain plug and clamp the plug in a bench vise. Larry Goss taught that trick to anyone who would listen.
(Photo © Russ Chastain)
Use a 1/2″ socket to remove the four cap screws holding the top (shifter assembly) on, and remove the top.
This is what it should look like inside, although the sliding gears will likely be in different positions.
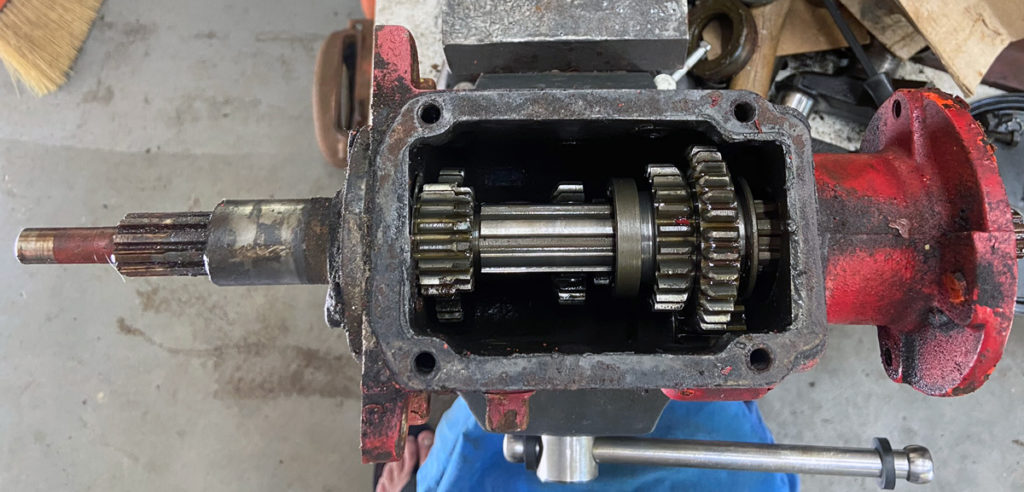
Top view of T92 3-speed Power King tractor transmission.
(Photo © Russ Chastain)
Once that’s done, remove the bearing retainer from the front. It’s held on by three 5/16″ cap screws; a 1/2″ socket works well to remove them.
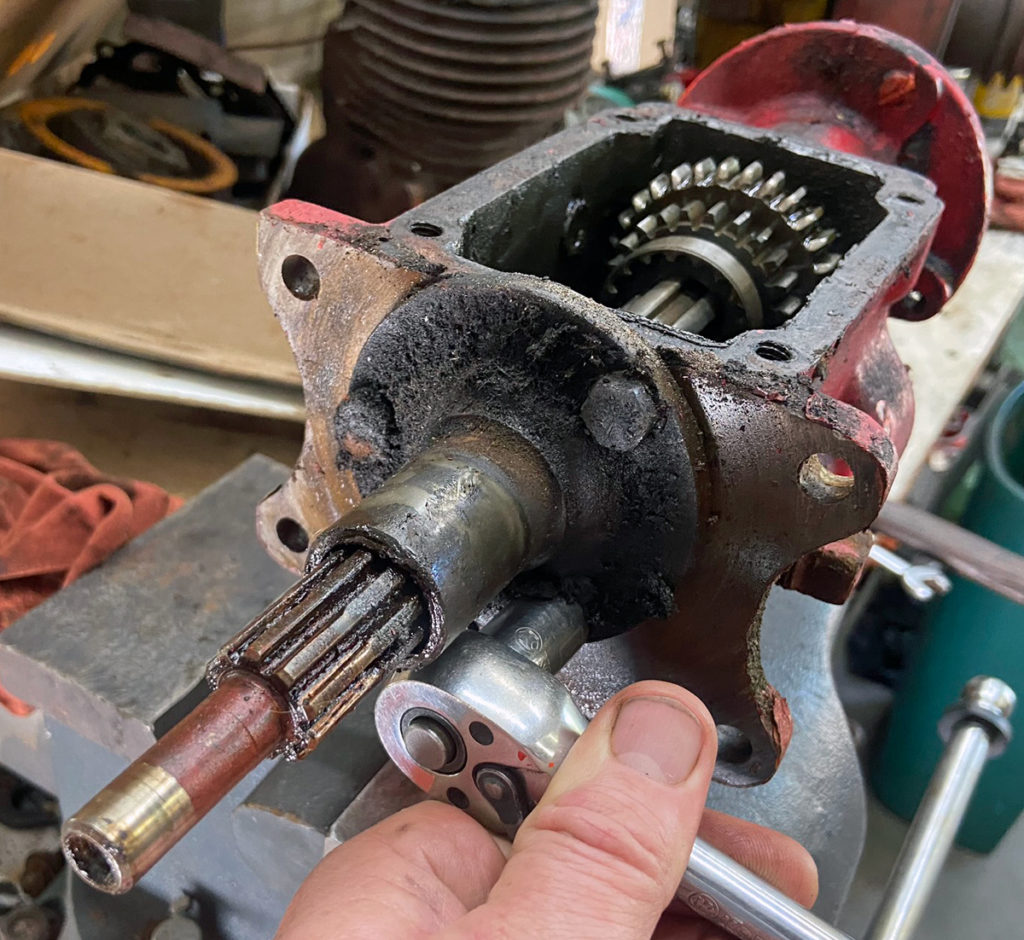
(Photo © Russ Chastain)
Plenty of gunk on this one. I’ll toss it into some fuel oil or diesel to soak.
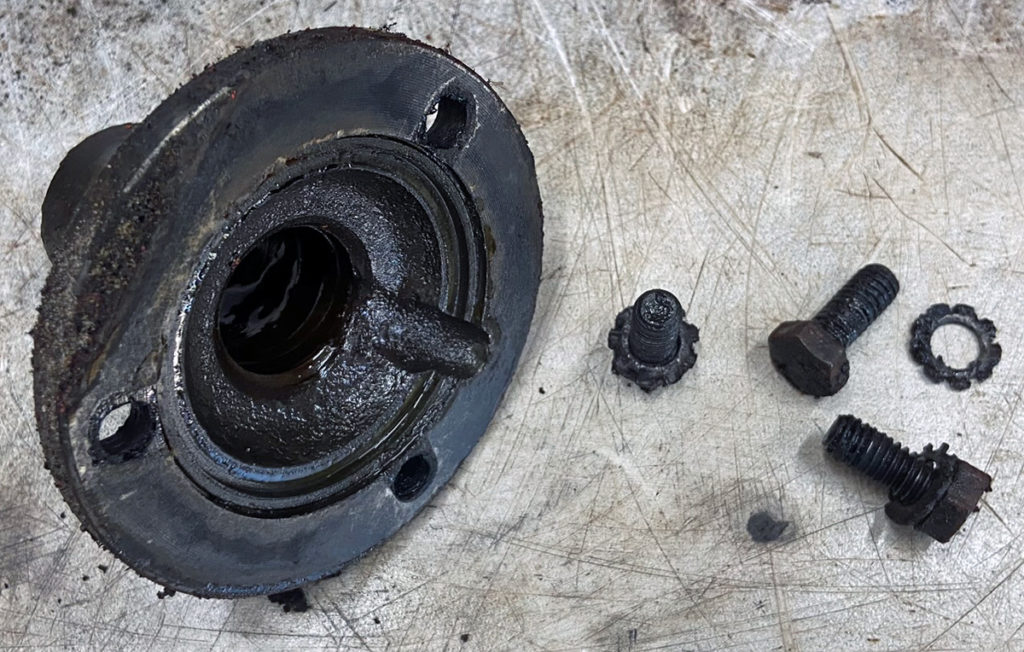
(Photo © Russ Chastain)
At this point, the input shaft and its bearing are only held in place by a bit of friction.
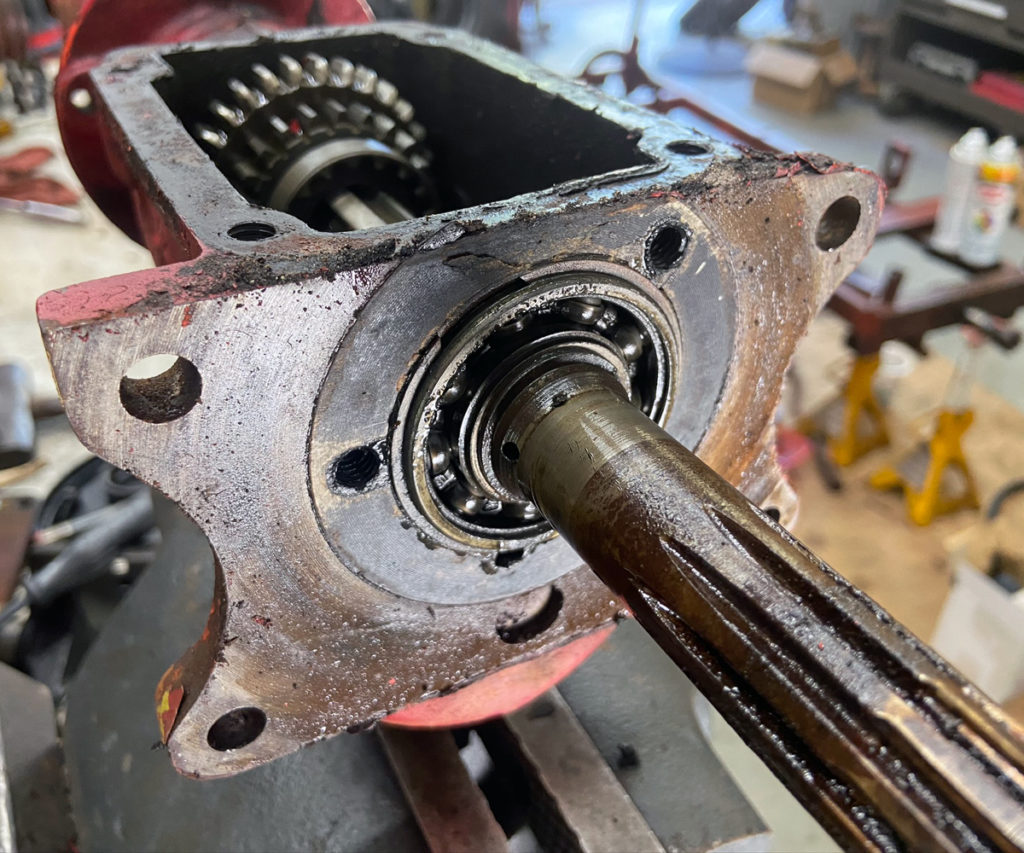
(Photo © Russ Chastain)
You can grab the input shaft to pull it out… do this slowly.
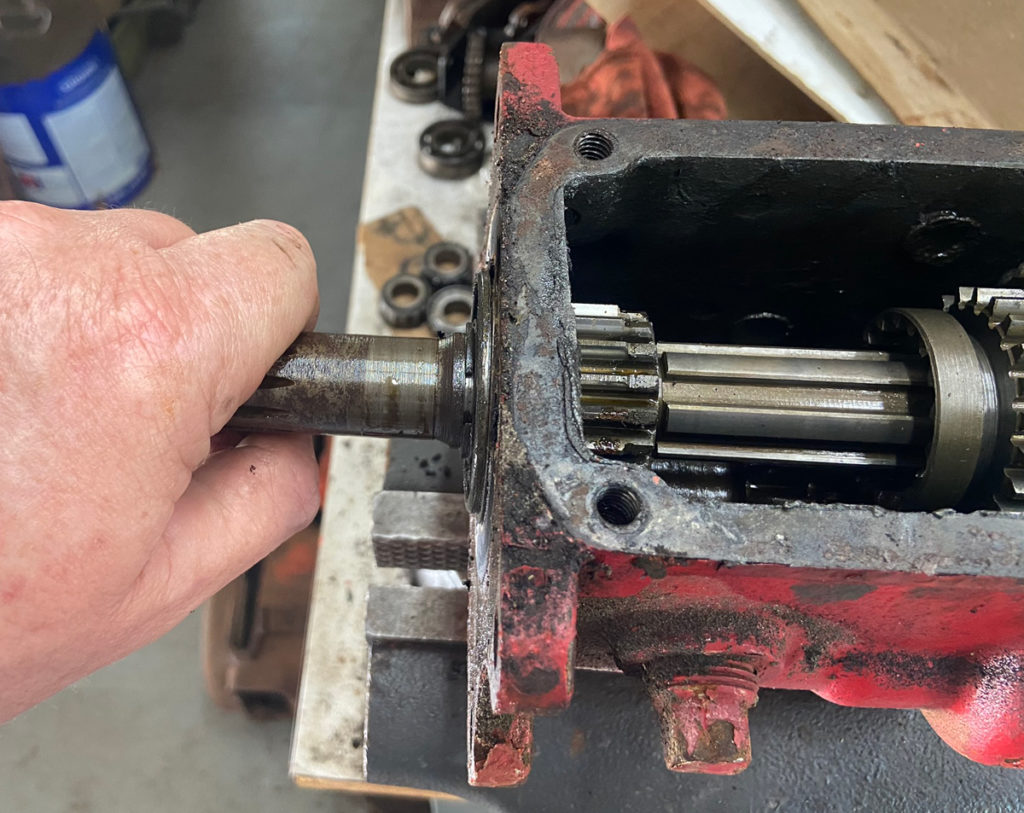
(Photo © Russ Chastain)
Go slow and easy, and stop when you get more or less to this point.
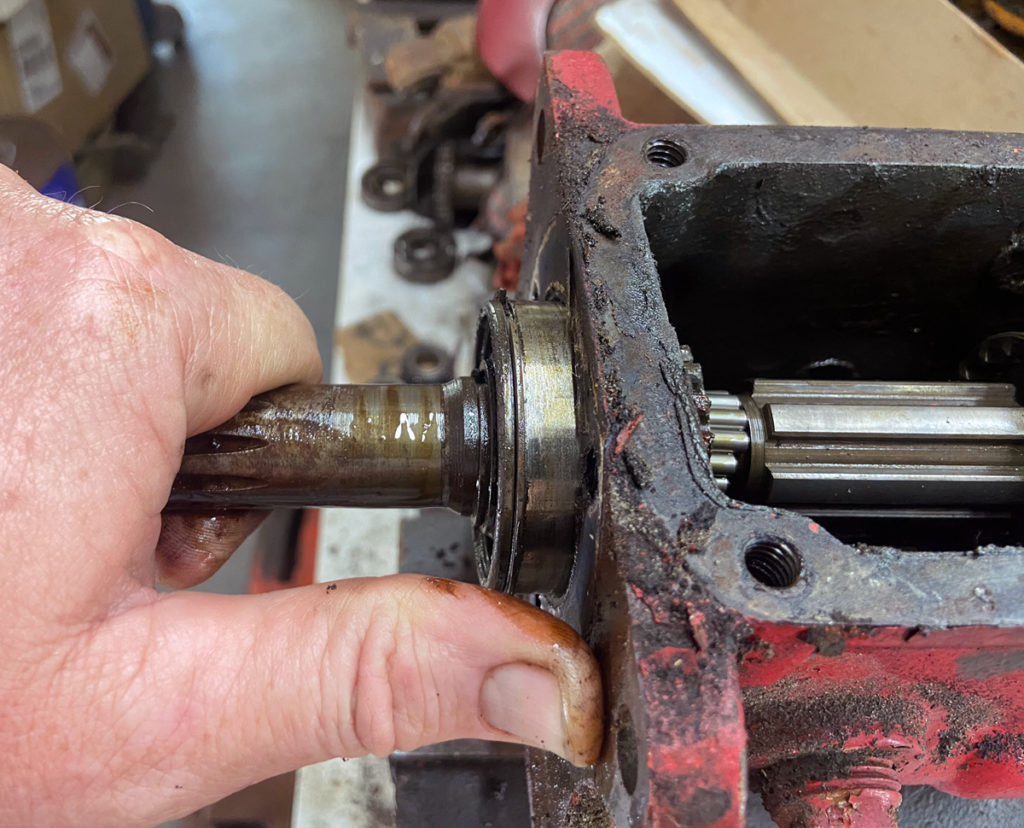
(Photo © Russ Chastain)
There are 13 roller/needle bearings that go between the input and output shafts. They are loose and if you’re not careful they will fall down inside the transmission — and if you are doomed, they will fall onto the ground and disappear.
This is a good time to slide them forward into the input shaft before you pull that shaft out any farther.
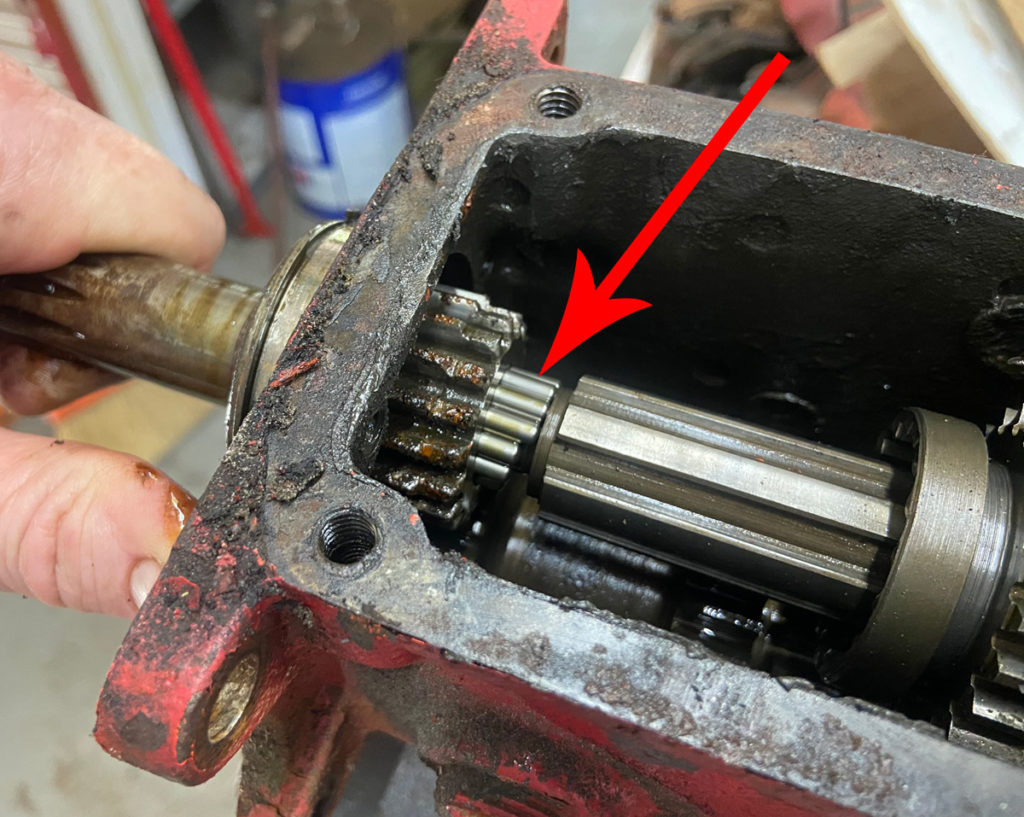
(Photo © Russ Chastain)
Because I remembered to push the bearings up into the shaft, I didn’t lose any of them into the transmission. They all stayed with the input shaft (the other 3 are down inside there).
It’s also a good idea to loosen the vise so you can tip the transmission forward, angling the input shaft towards the ground. This way, gravity can be your friend by encouraging the needles to remain inside the input shaft.
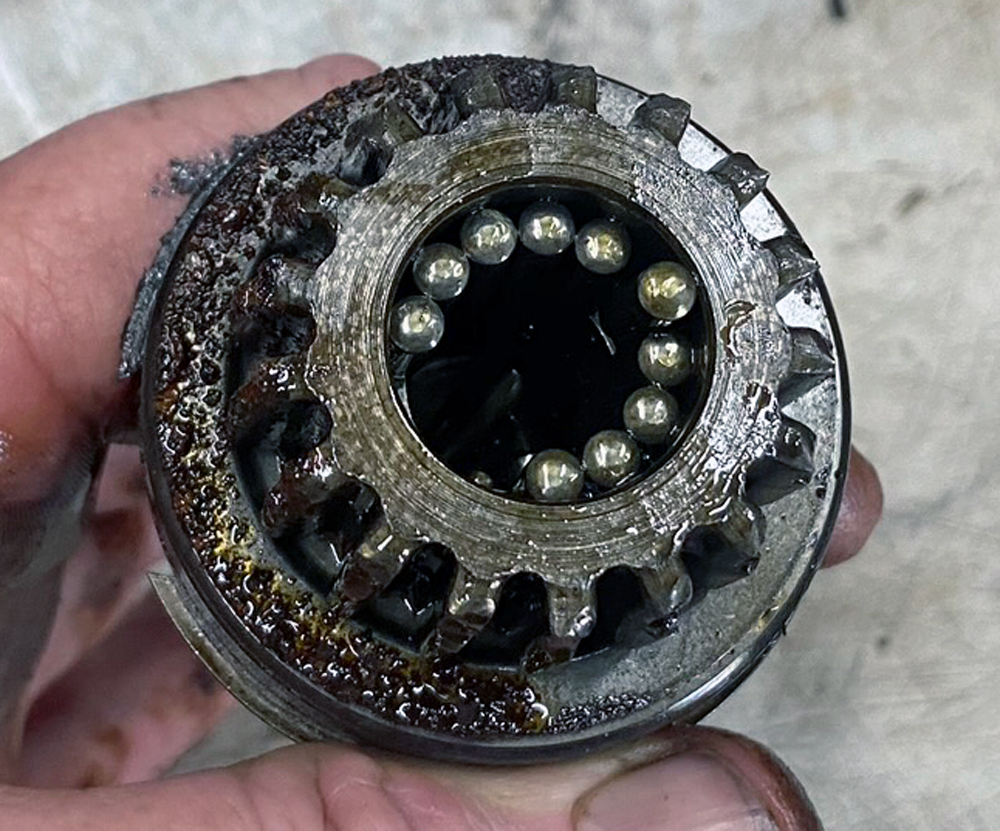
(Photo © Russ Chastain)
These needle bearings are precious, so don’t lose them! They are not widely available, and they are far from cheap.
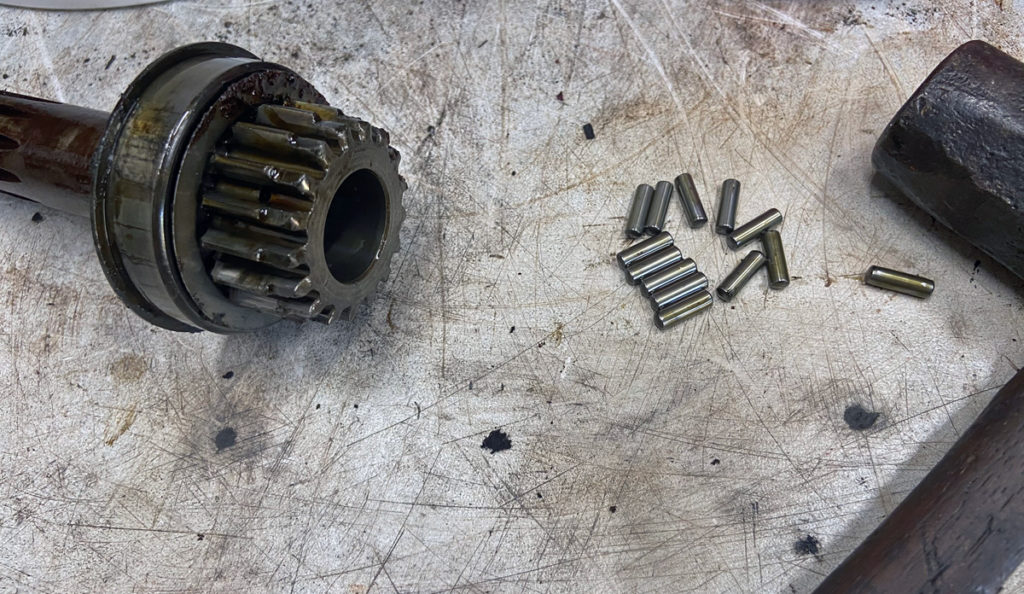
Keep track of the 13 needles, they are precious!
(Photo © Russ Chastain)
Time for snap rings. Argh! Make sure you wear eye protection.
Secure the transmission with its rear end pointing up, and clean out the decades’ worth of goop so you can see the snap ring that holds the rear bearing in place.
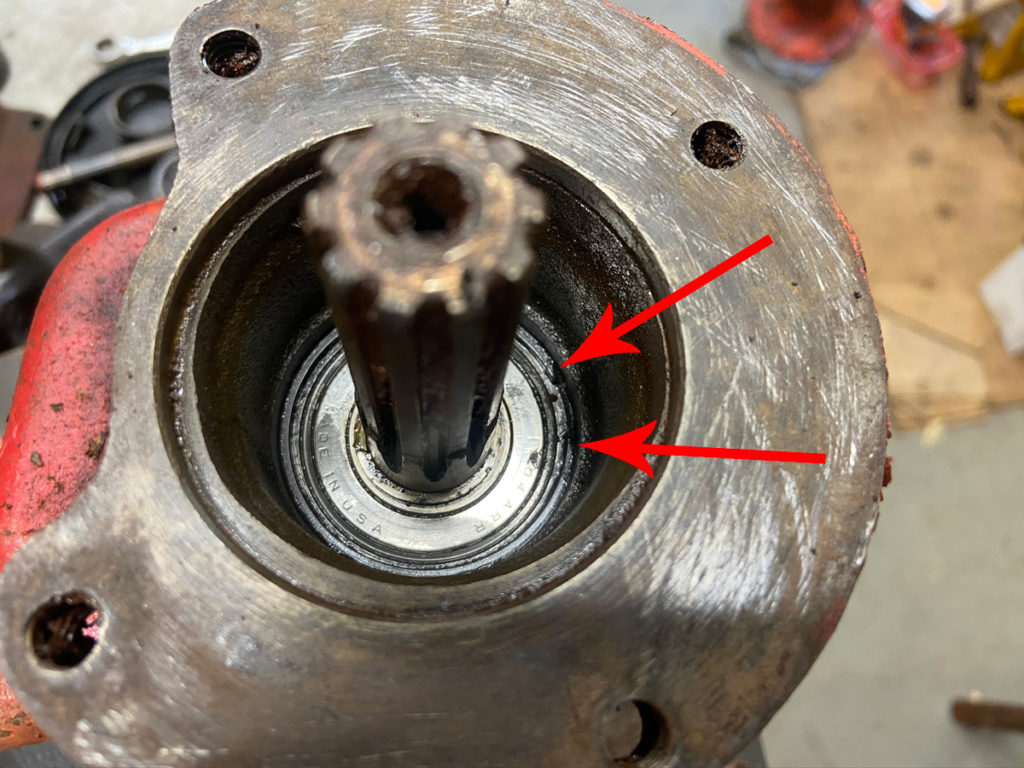
Arrows indicate the two ends of the rear bearing snap ring.
(Photo © Russ Chastain)
Snap rings are about as fun as a case of the cla-… um, never mind. Anyhow, they are aggravating even when you’re not trying to photograph them. This picture shows a screwdriver prying one end of the snap ring out of its groove.
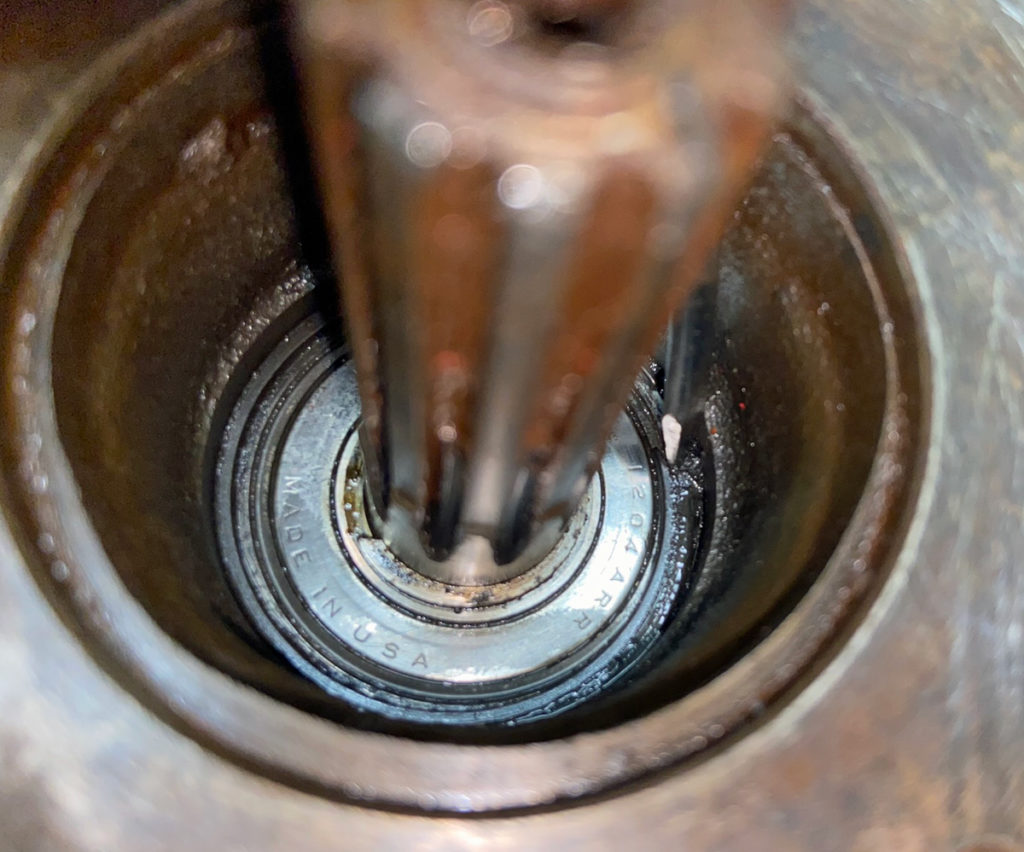
Use a screwdriver or similar tool to pry out one end of the snap ring.
(Photo © Russ Chastain)
You need to lift the snap ring while it’s pried out… a small pick is useful for that. Now we have one end of the snap ring out where we can work on it.
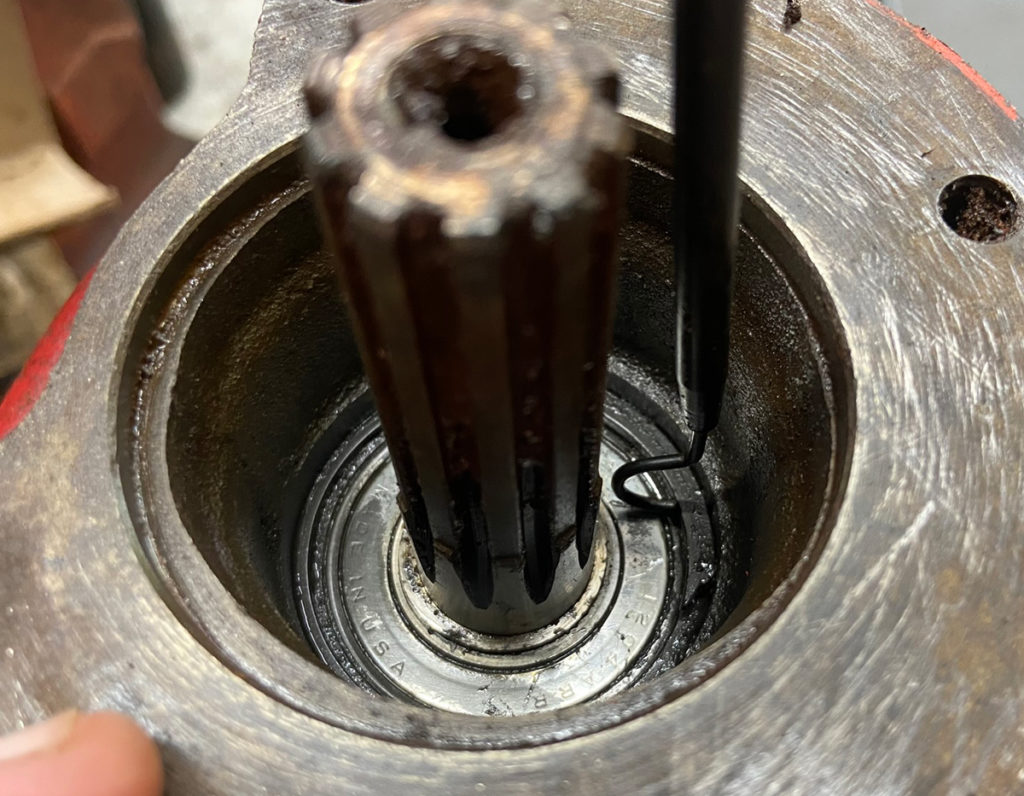
Lift the snap ring to prevent it from slipping back into the groove.
(Photo © Russ Chastain)
Use a couple screwdrivers to pry it out while you lift with the pick or whatever tool works for you. Be prepared to say a few naughty words when it gets away from you…
Biggest thing to remember here is: Don’t force it! A bent snap ring is an even bigger pain than a non-bent one.
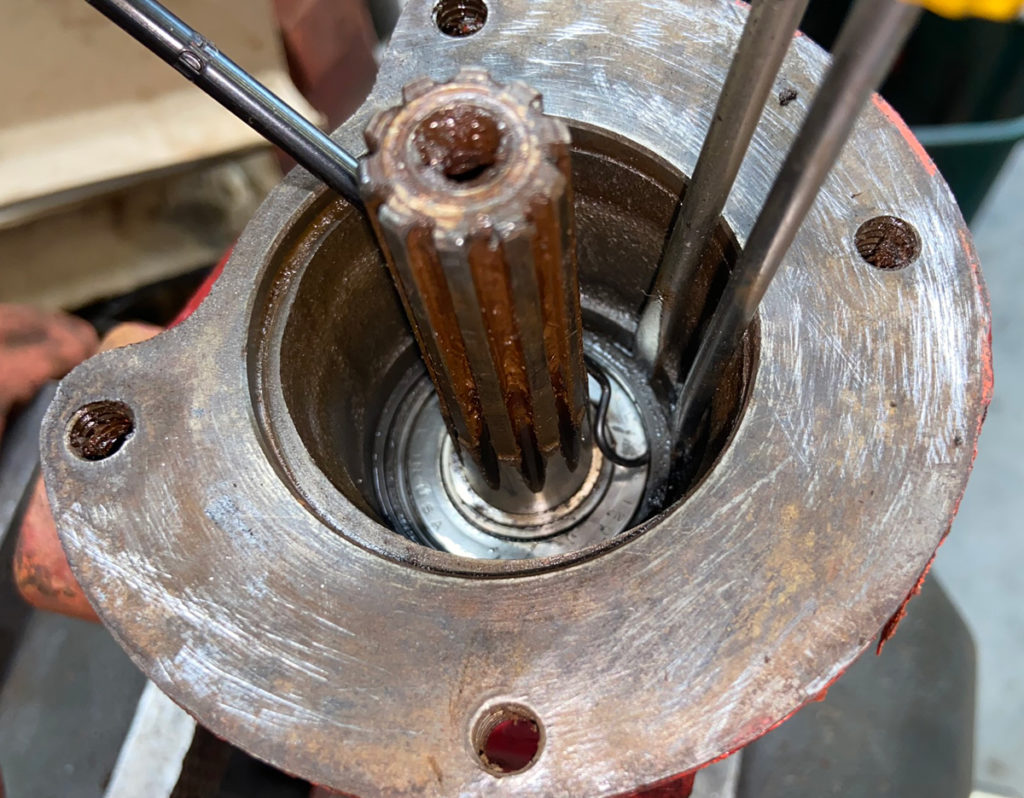
Screwdrivers work snap ring out of groove, pick lifts it.
(Photo © Russ Chastain)
Finally got the pick behind the ring so it can’t get away. Next is a combination of prying and lifting until it comes up out of the groove entirely.
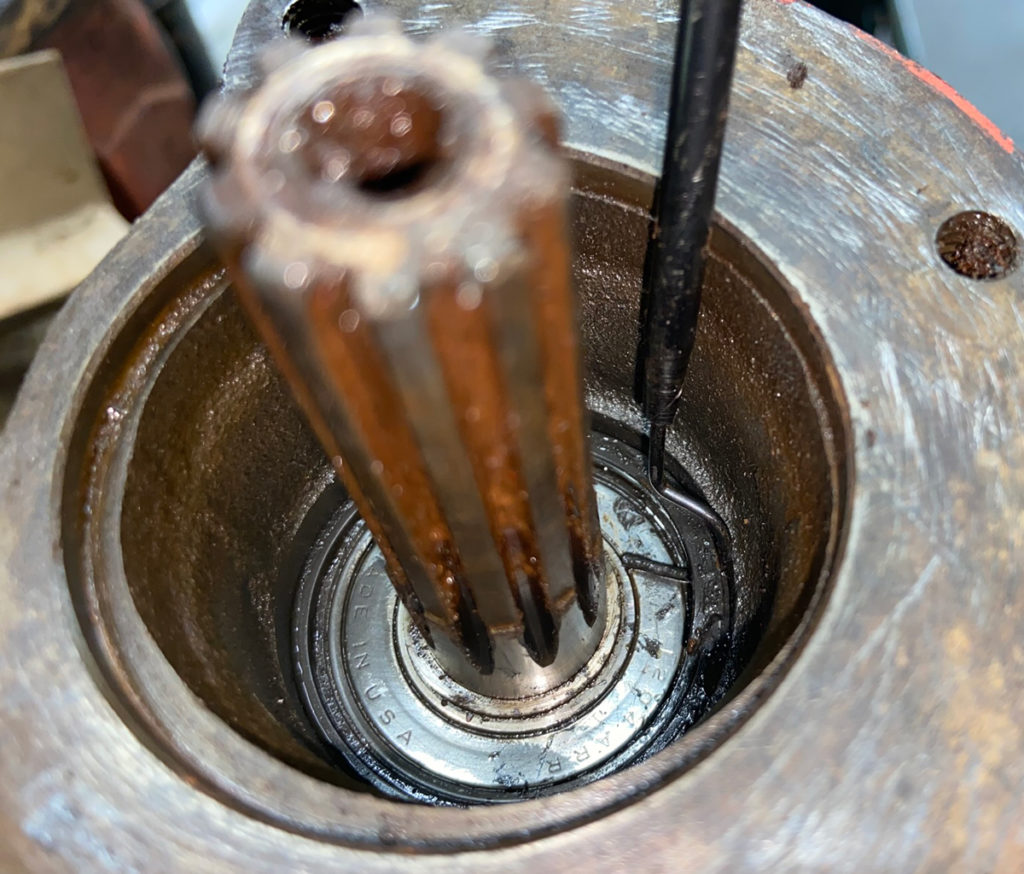
Hooking the pick like this helps keep the snap ring from getting away from you.
(Photo © Russ Chastain)
Mwahahaha!
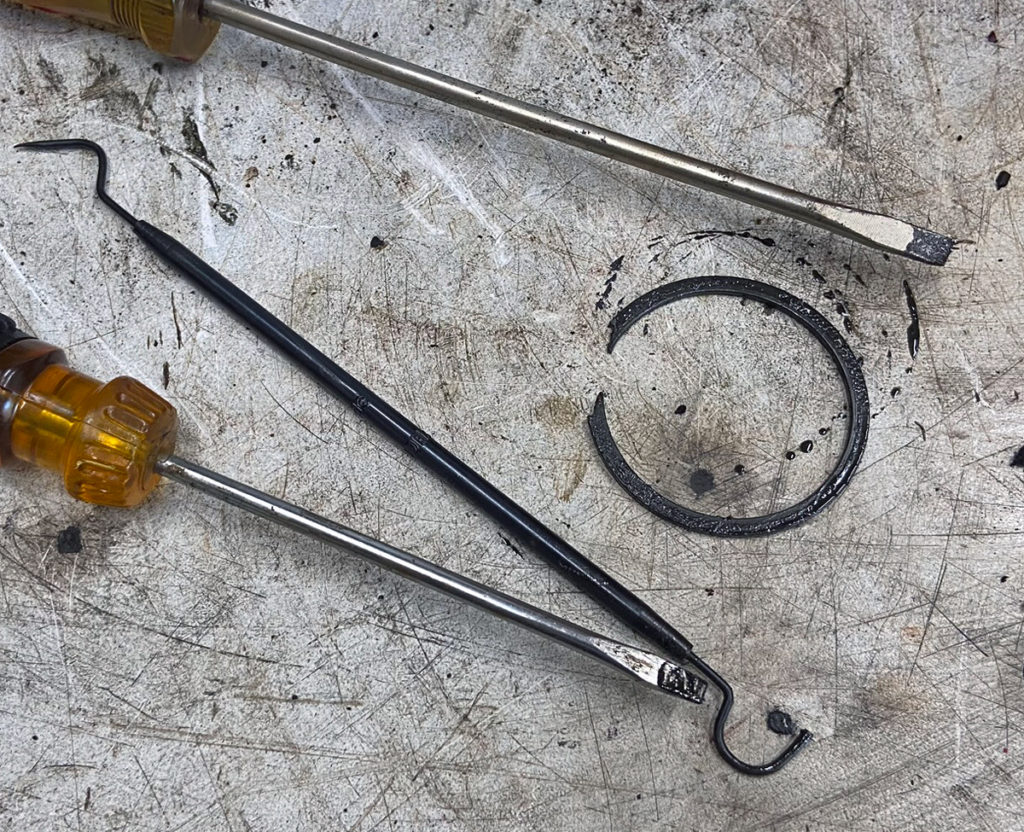
Snap ring removed!
(Photo © Russ Chastain)
Next, remove the output shaft (indicated by arrow). It shouldn’t be difficult to move, but a hammer helps… just don’t hit the shaft with anything harder than brass. Don’t want to mar or deform it!
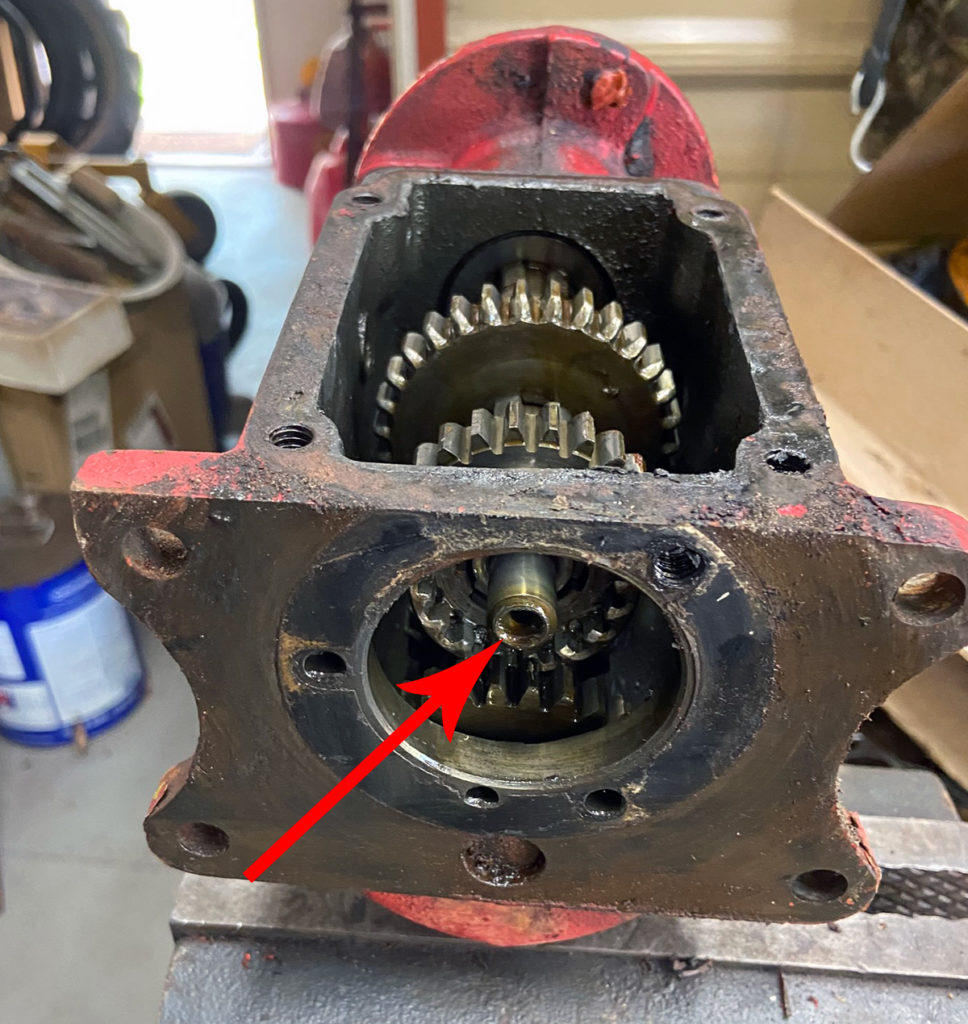
Arrow indicates shaft to be removed by pushing it towards the rear of the case.
(Photo © Russ Chastain)
I happen to have a big honking piece of brass for just such occasions. I’ll swat this with a hammer a couple times.
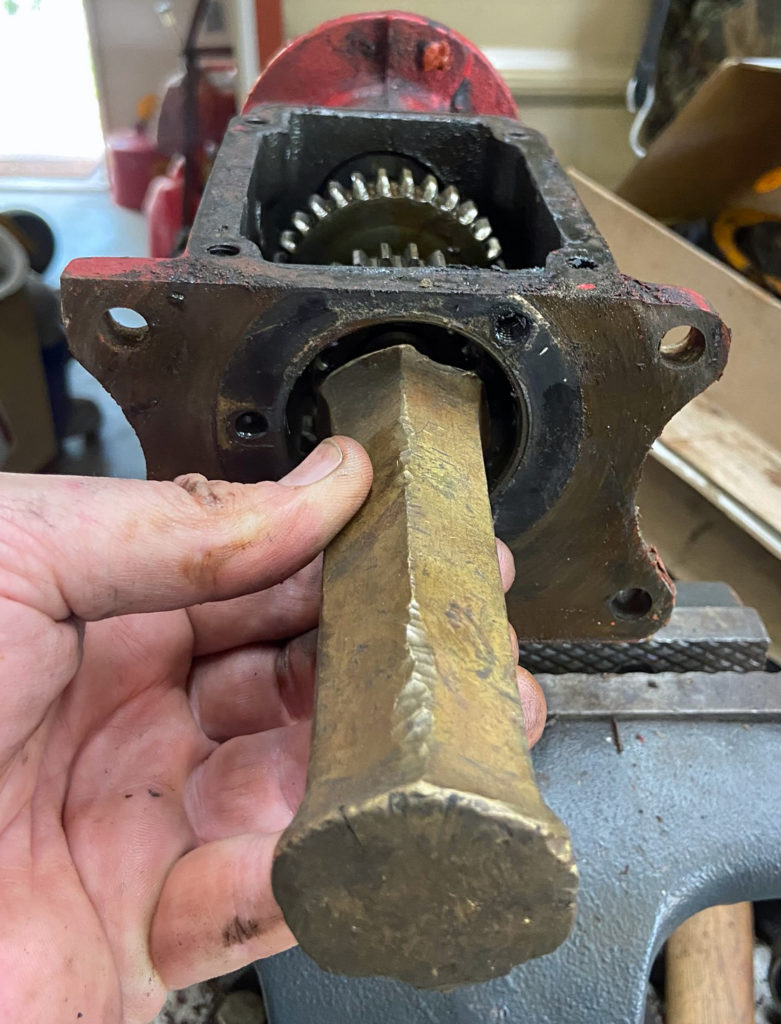
This big brass punch will prevent damage to the shaft.
(Photo © Russ Chastain)
As the shaft slides rearward, a couple sliding gears will come off of it.
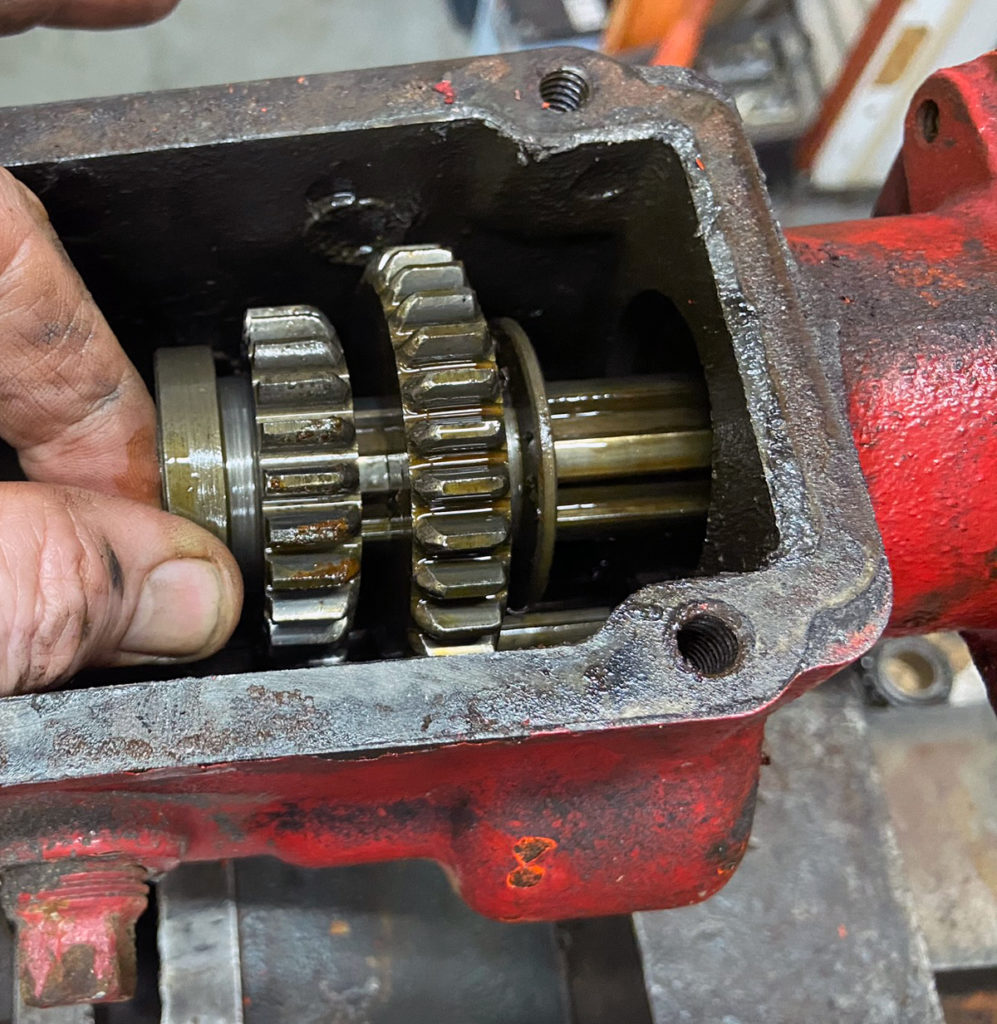
The shaft will slide out of these gears.
(Photo © Russ Chastain)
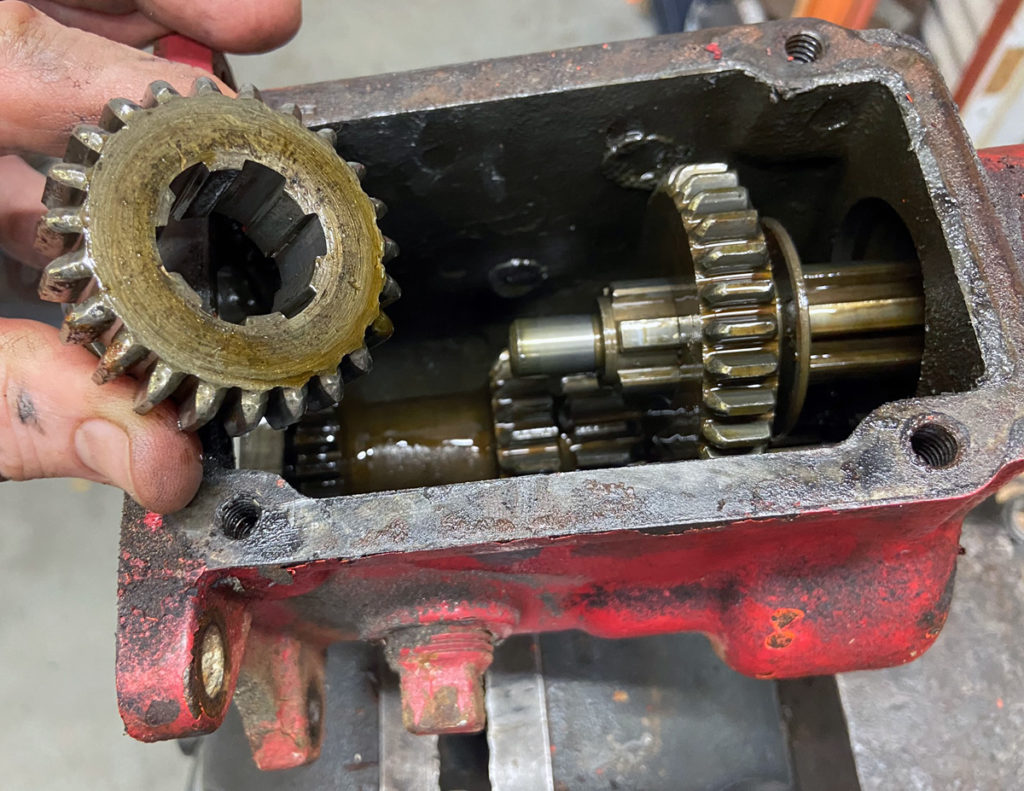
One gear removed, one to go.
(Photo © Russ Chastain)
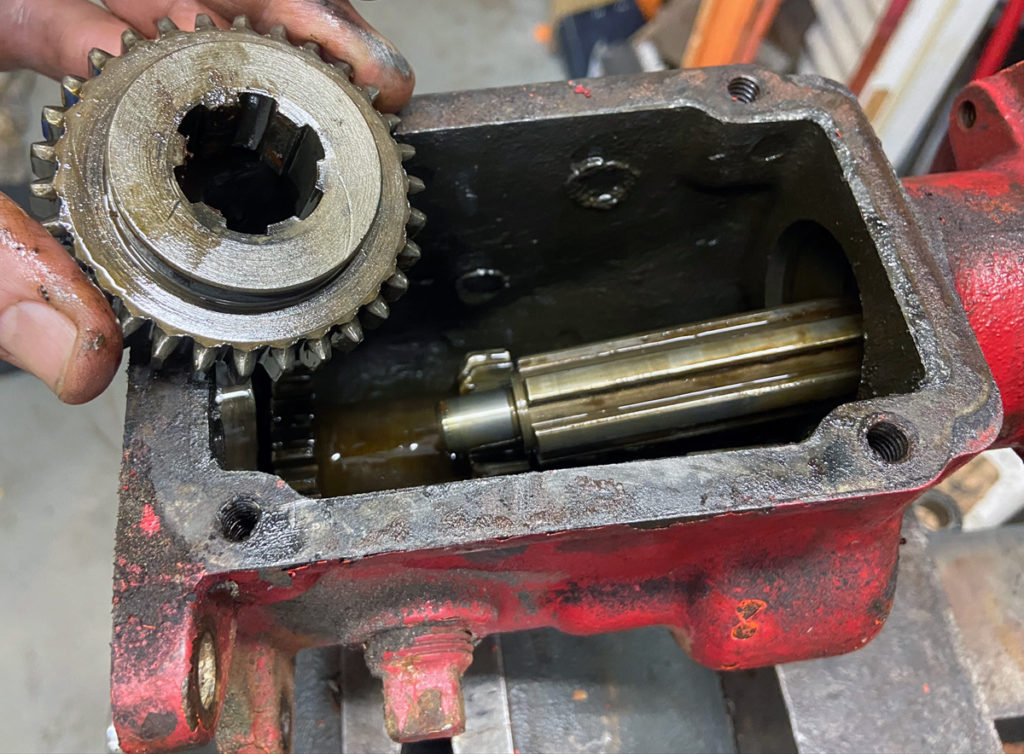
Another gear removed. Shaft & bearing are now free to be removed.
(Photo © Russ Chastain)
Hooray and all!
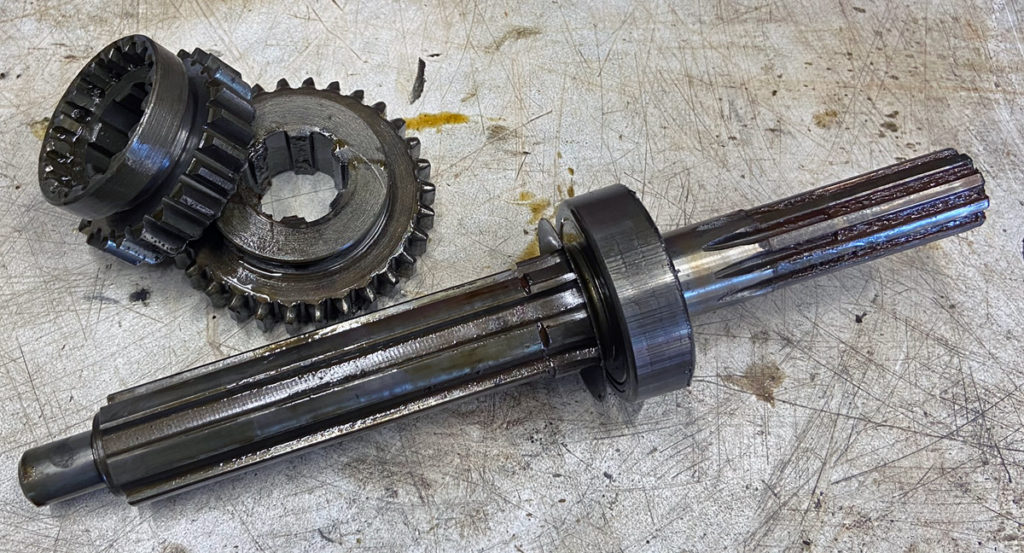
Output shaft & gears.
(Photo © Russ Chastain)
Not done yet… we still have the big ol’ cluster gear and reverse idler gear in there. These ride on steel shafts, which are held in place by a little hunk of sheet metal called a lock plate.
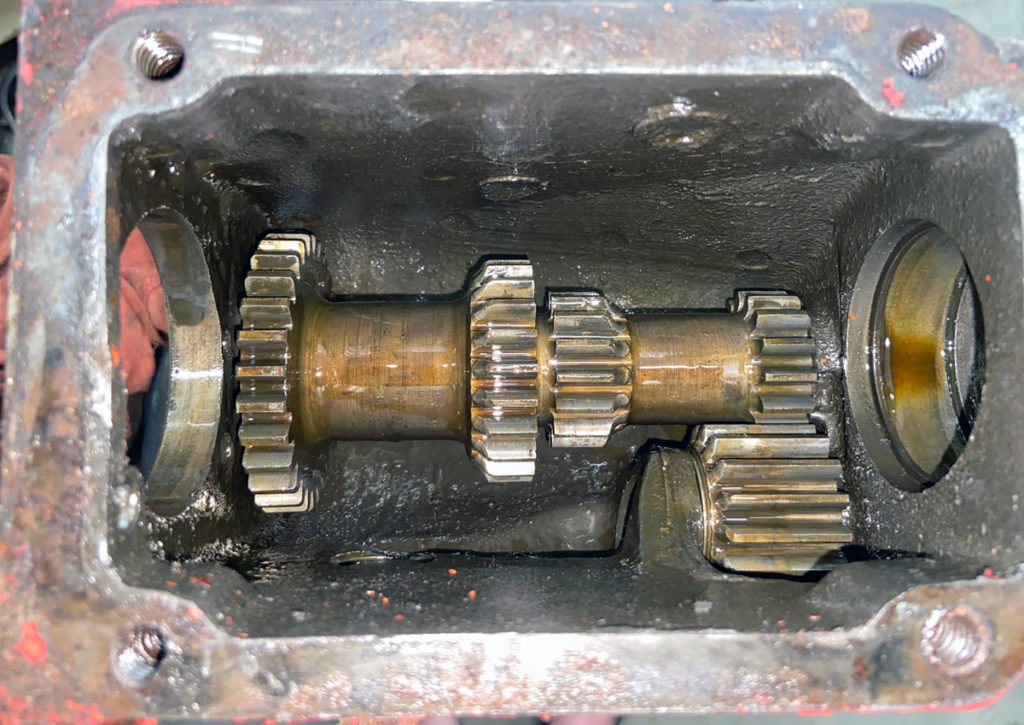
Cluster gear and reverse idler gear.
(Photo © Russ Chastain)
The lock plate is held by a single 1/4″ cap screw… use a 7/16″ socket & extension to remove it.
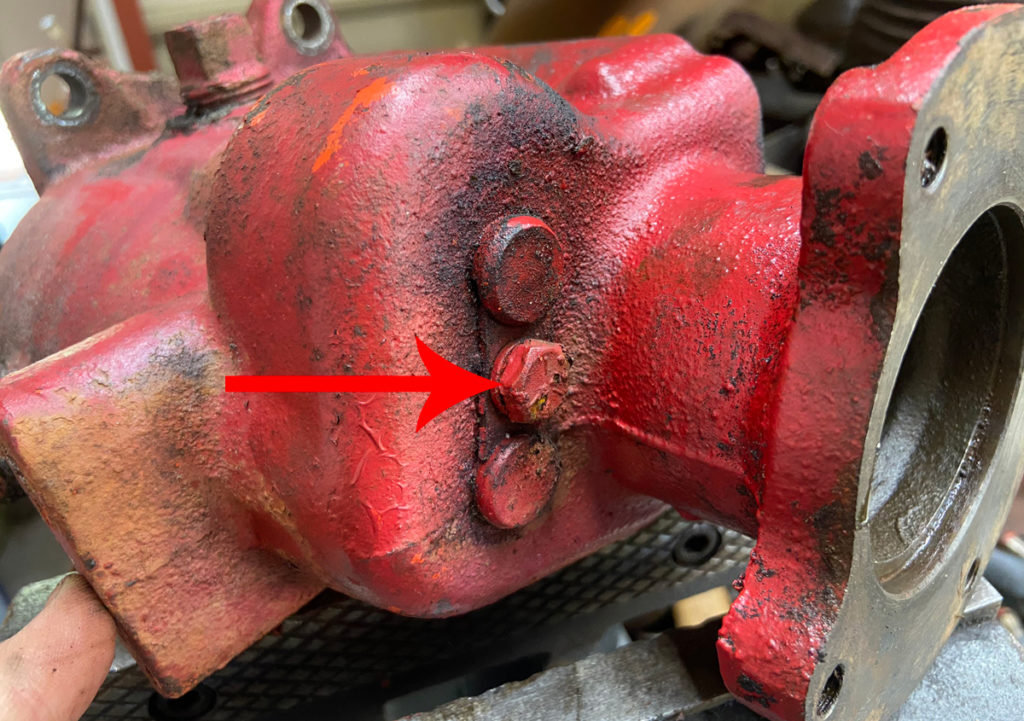
Remove this retaining screw.
(Photo © Russ Chastain)
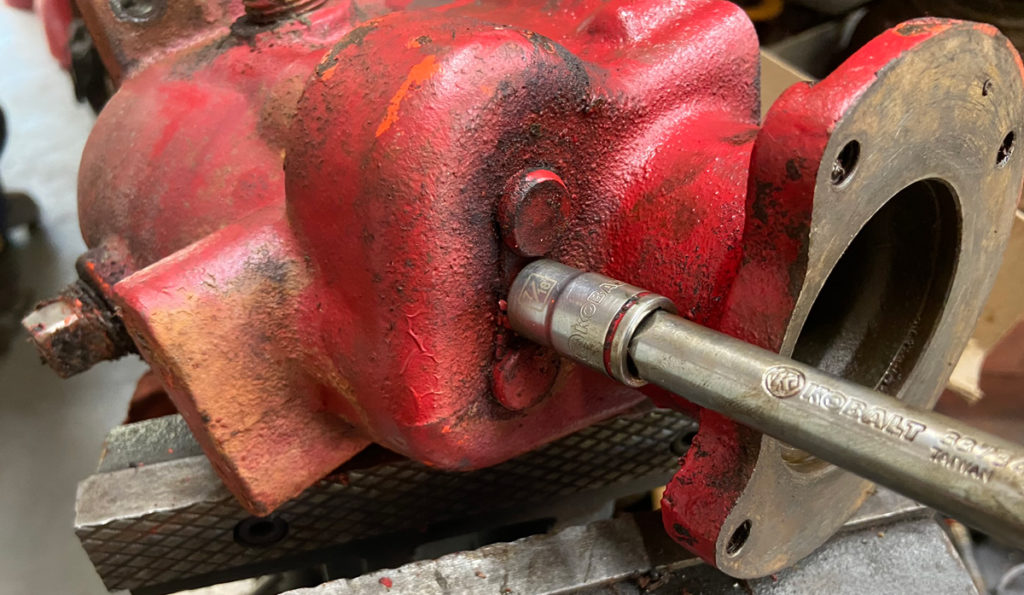
A 7/16″ socket with extension will do the job well.
(Photo © Russ Chastain)
Usually, paint and other crud will keep the lock plate from coming free. To loosen it, use a punch to smack the ends of the shafts. Here’s me using a steel punch when I should be using a brass one to whack the end of the cluster gear countershaft.
(My “punch” is actually a hunk of an old Power King tie rod that rusted in two.)
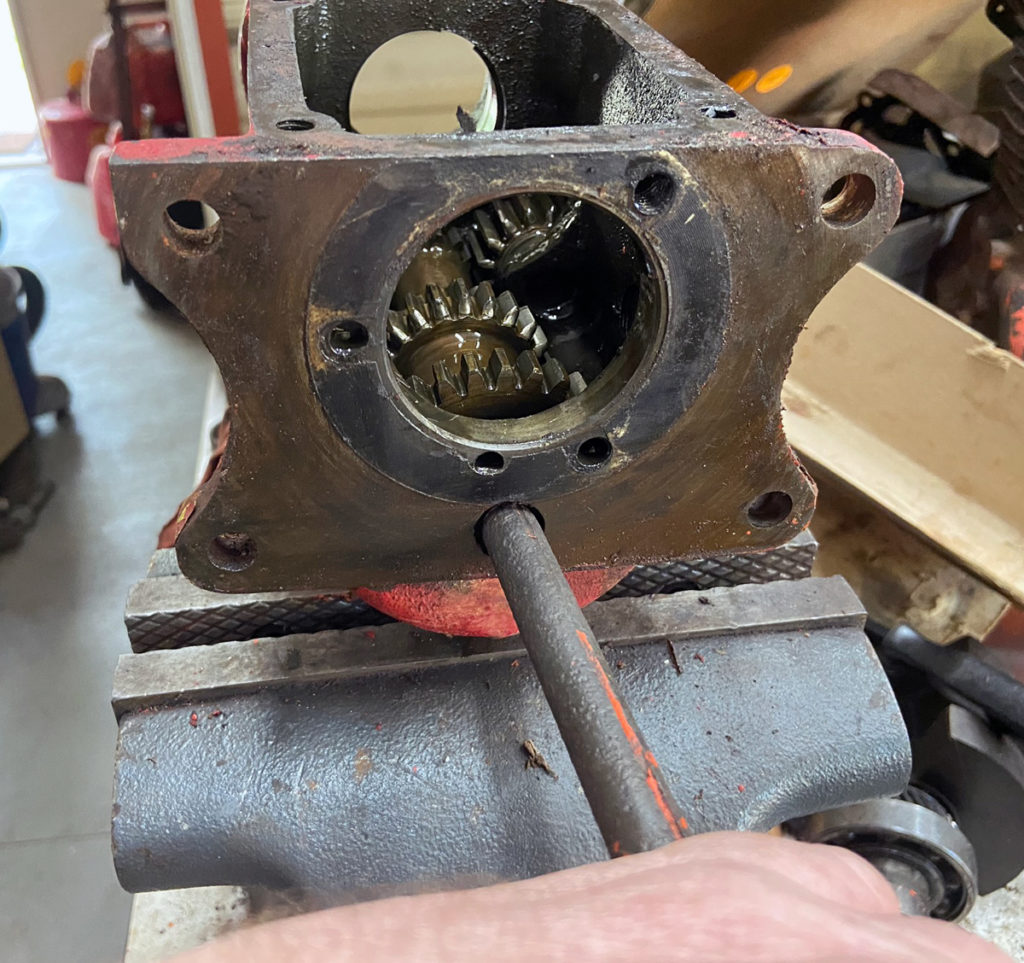
Give the cluster gear shaft a swat with a punch from the front end just to budge it a little.
(Photo © Russ Chastain)
The inside end of the reverse idler gear shaft can be accessed like so; all you need to do is move it juuuuuust a tad to loosen the lock plate.
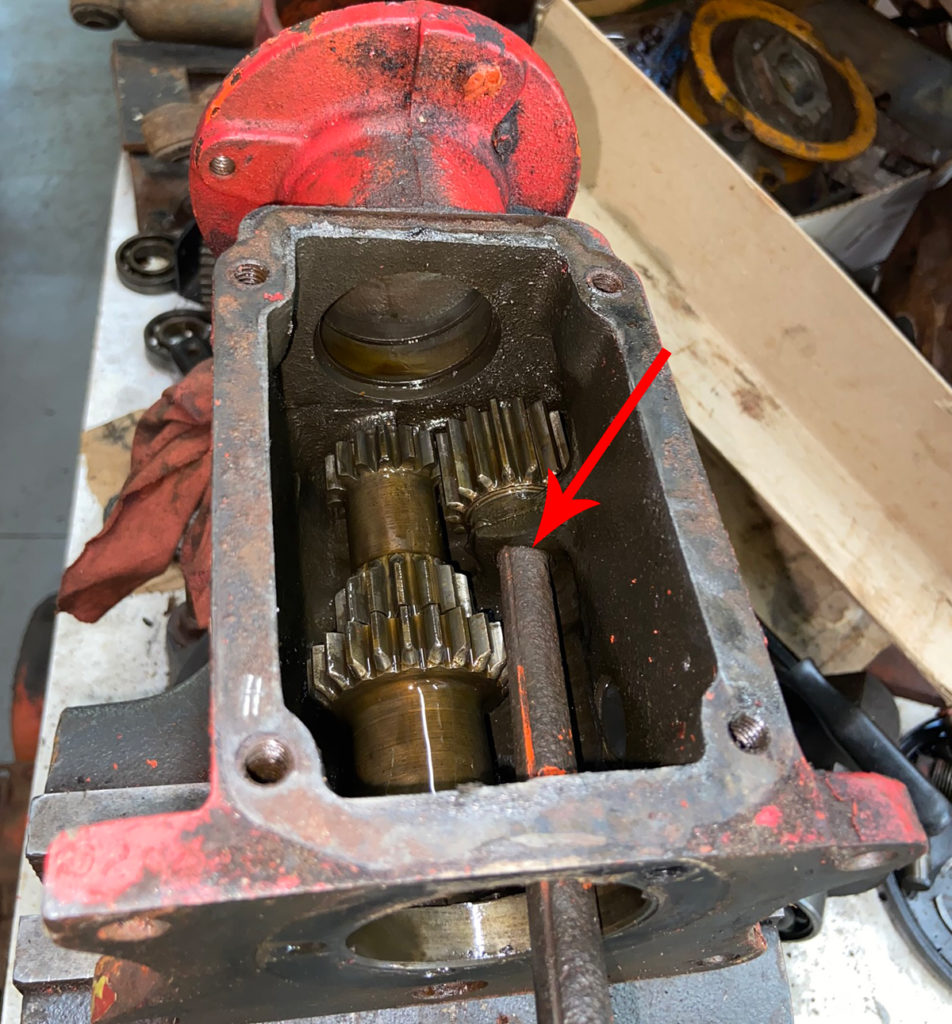
Also swat the reverse idler a bit. Arrows shows punch covering end of shaft.
(Photo © Russ Chastain)
We’ve loosened it up and now it can be removed.
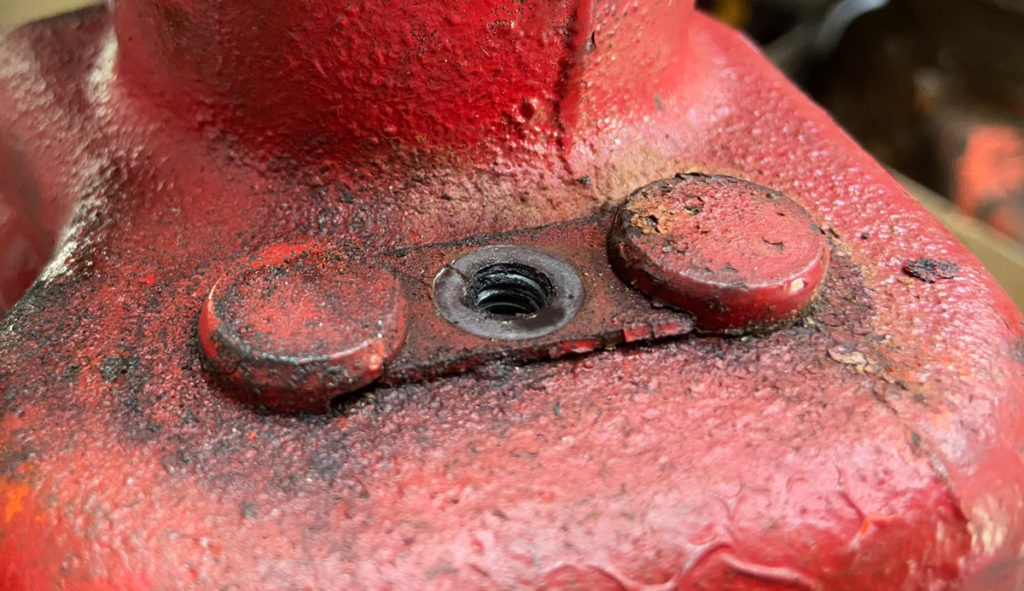
Usually, this little lock plate is loose after you swatted the shafts. Slide it out of the grooves.
(Photo © Russ Chastain)
And there it is.
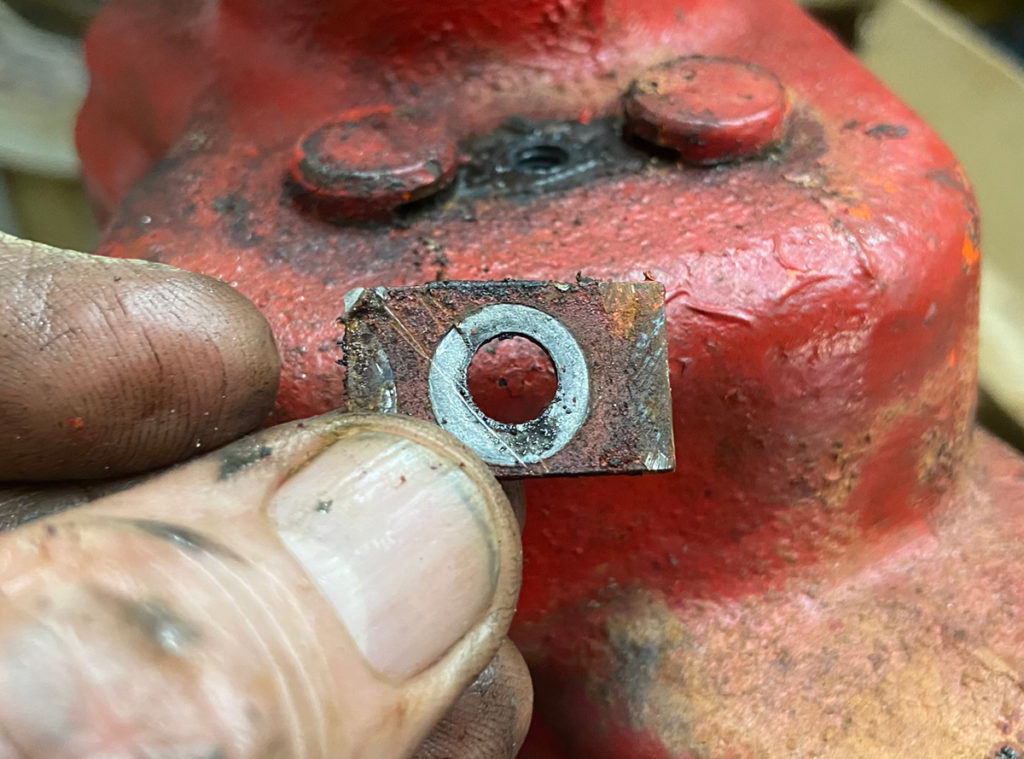
Lock plate removed.
(Photo © Russ Chastain)
Grooves in shafts where the lock plate lives.
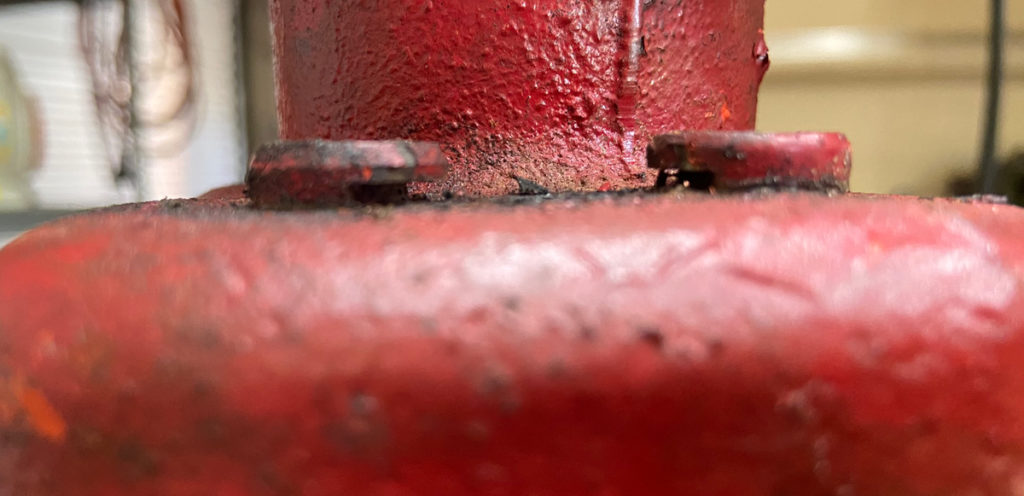
The lock plate engages with those grooves.
(Photo © Russ Chastain)
Remember when you smacked the shafts to loosen the lock plate? Well go back to that and drive out the shafts towards the rear of the transmission case. Be careful! There are bushings inside the gears and you don’t want to damage them.
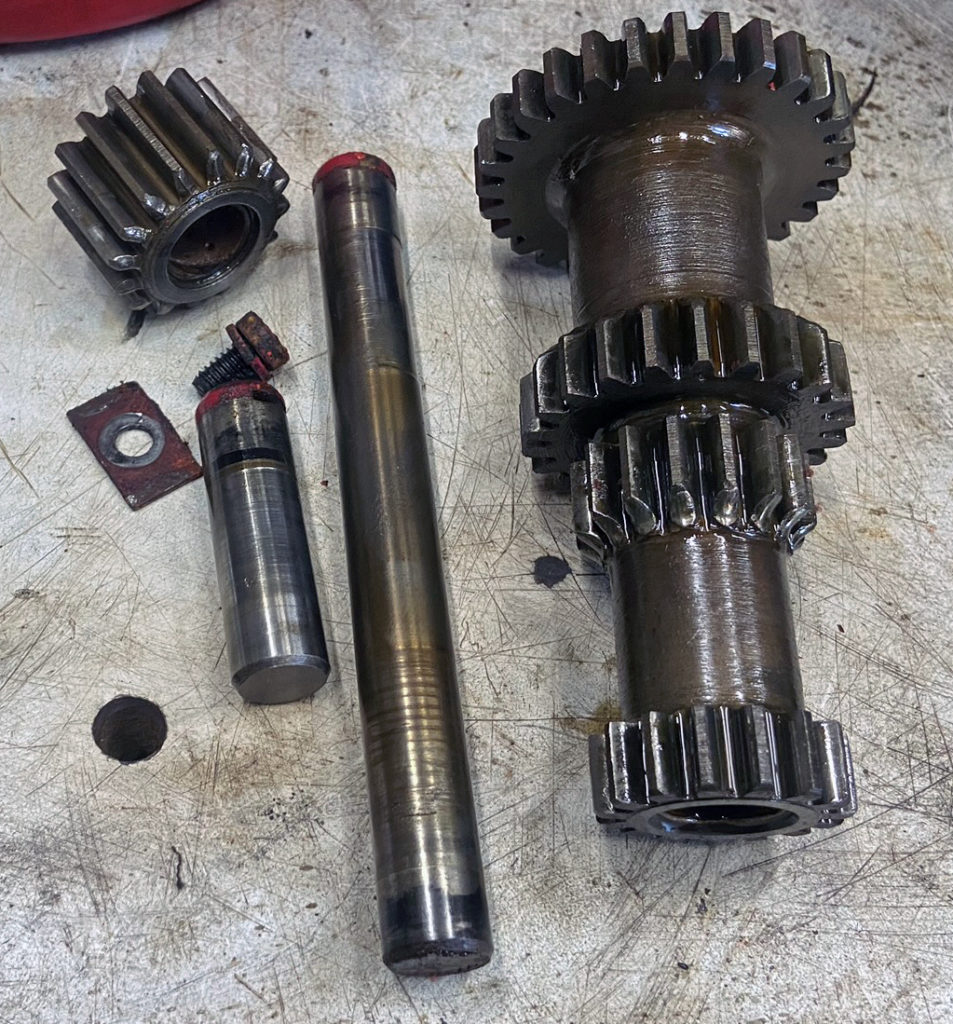
Cluster gear, reverse idler gear, shafts, lock plate, lock plate screw.
(Photo © Russ Chastain)
The shafts get worn… especially the longer one. Thankfully you can cut another lock plate slot opposite the original one using a grinder cutoff wheel so the gear bushings will then ride against an unworn surface. But I digress…
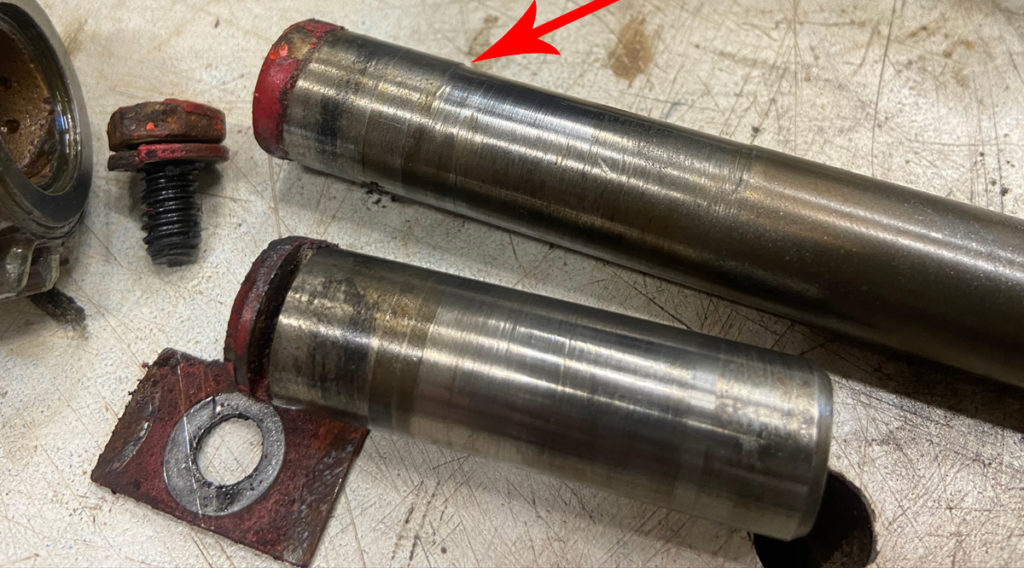
This shaft shows a lot of wear. Thankfully, you can reverse the shaft to give it a whole new life.
(Photo © Russ Chastain)
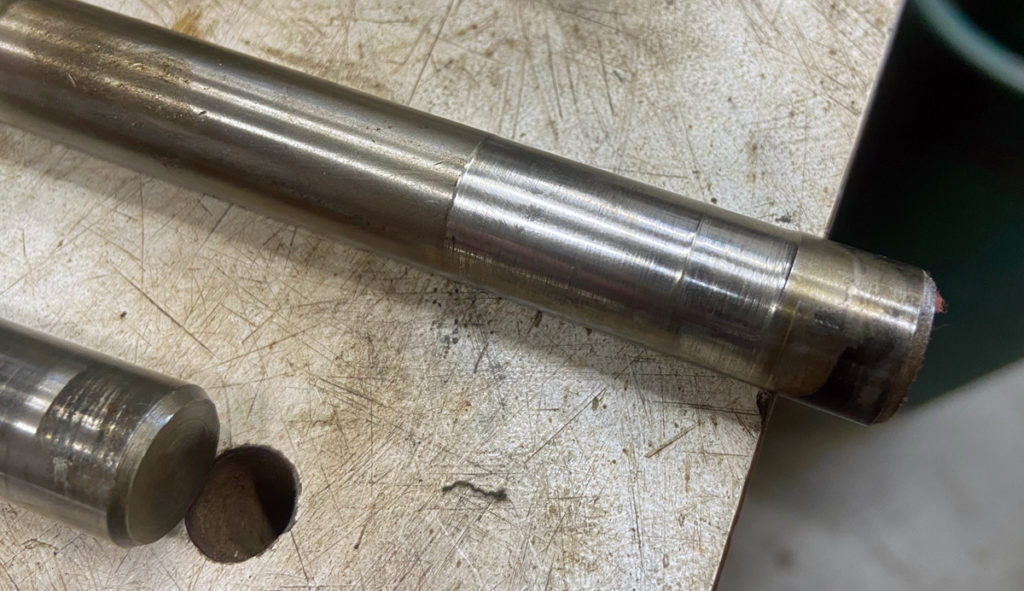
More wear on the cluster gear countershaft.
(Photo © Russ Chastain)
Grinding the gears while shifting is what causes this rounding of the gears.
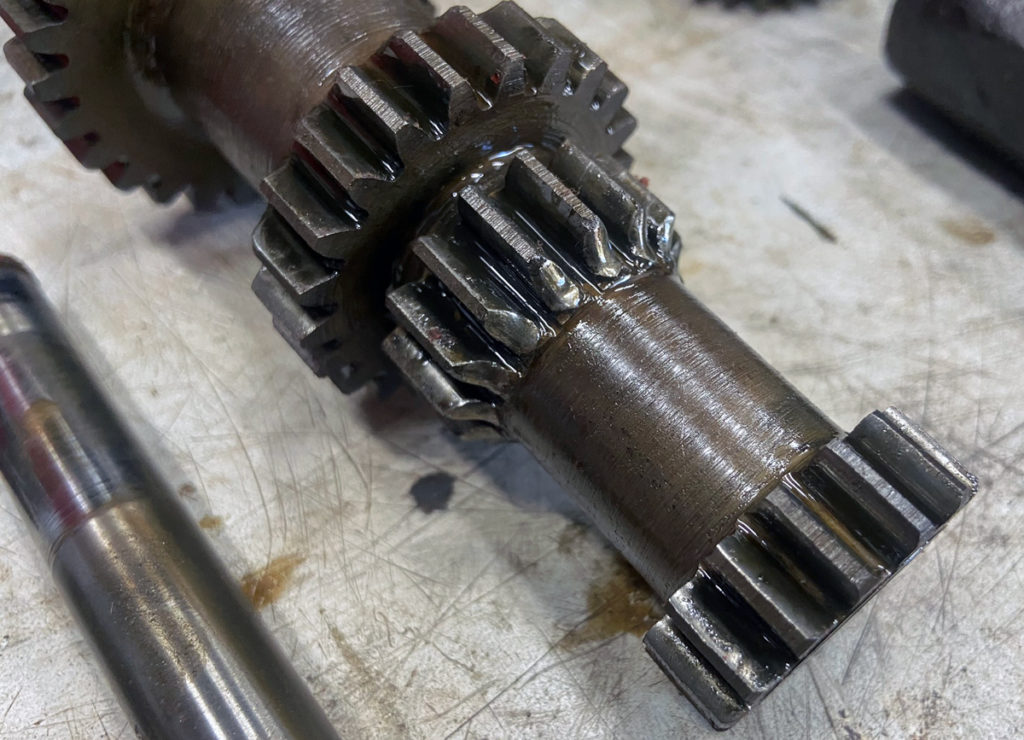
These gear teeth are worn from improper shifting.
(Photo © Russ Chastain)
The bronze bushings are probably okay, believe it or not. Most of the time they can go right back in without any problem.
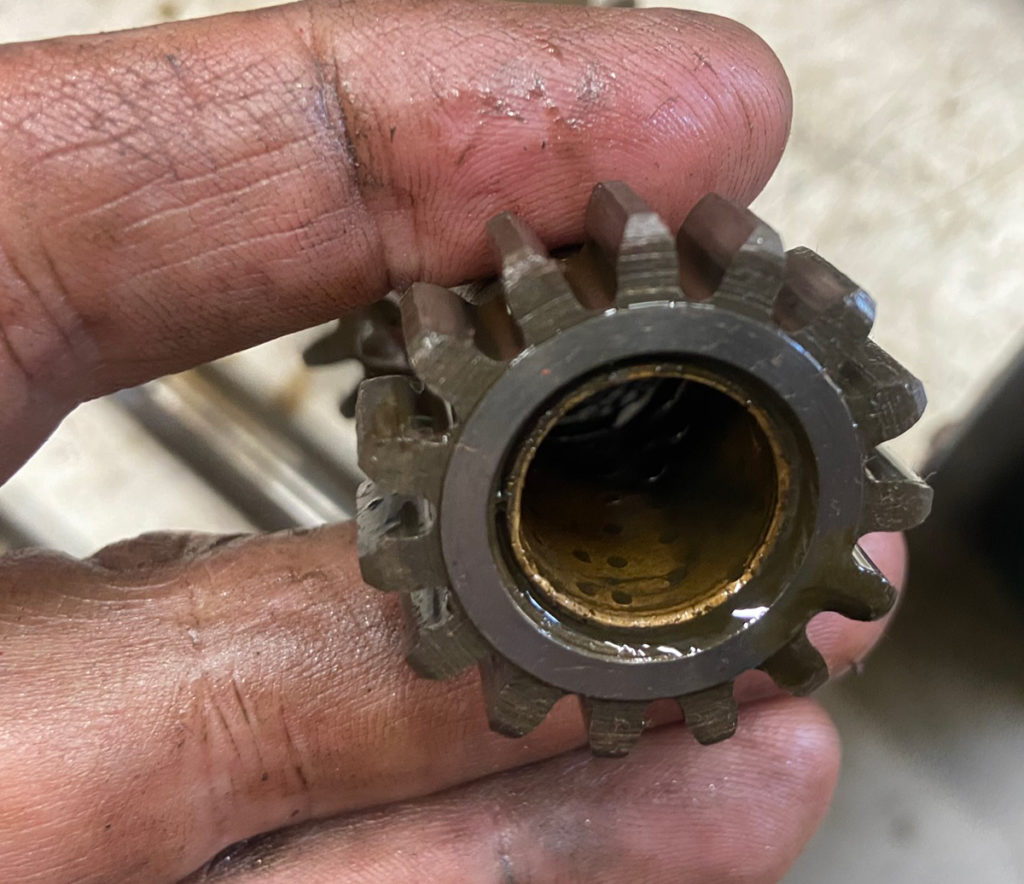
These bushings are usually good. I think they wear better than the steel shafts.
(Photo © Russ Chastain)
There’s another snap ring to locate the front edge of the rear bearing… just leave it in. My motto: Never remove a snap ring if you don’t have to.
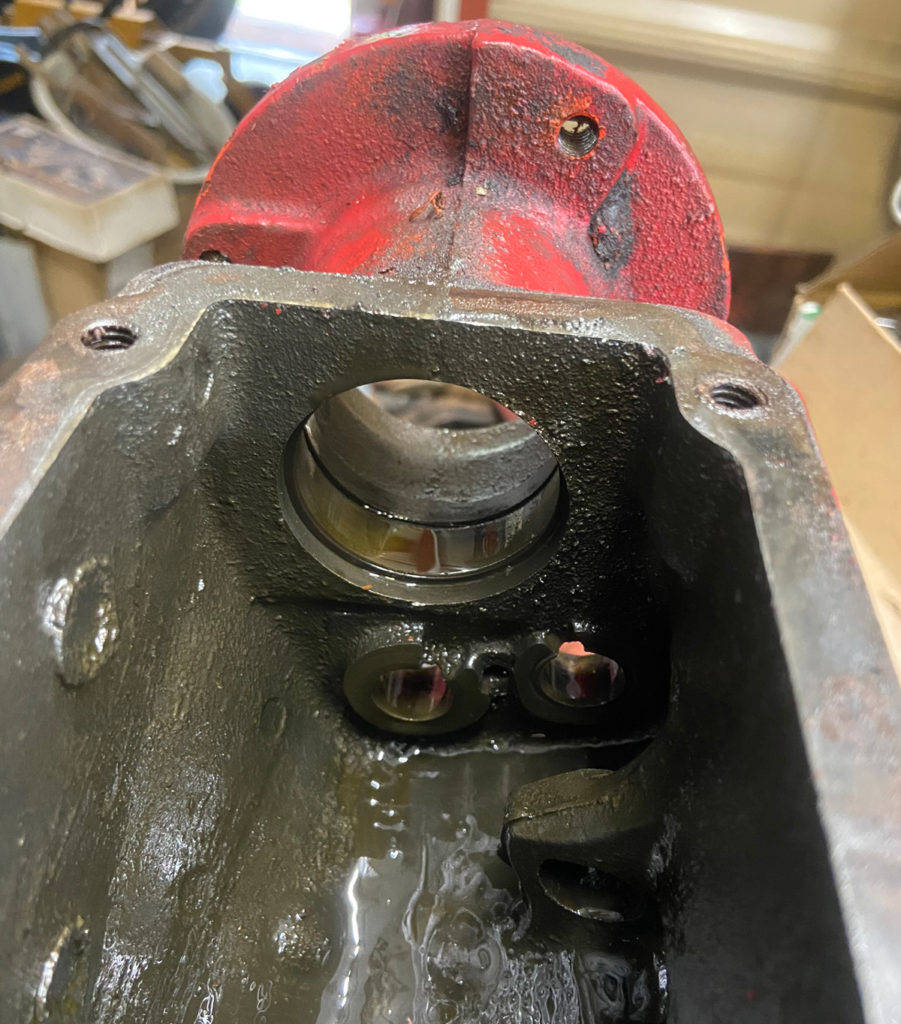
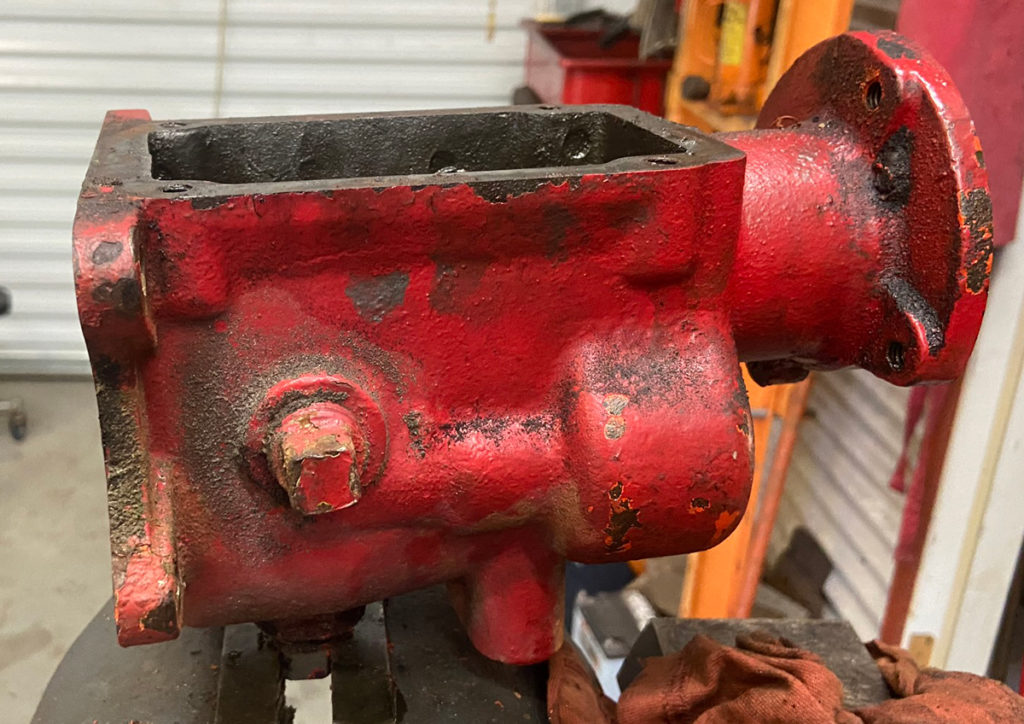
Other than that, the case is empty now.
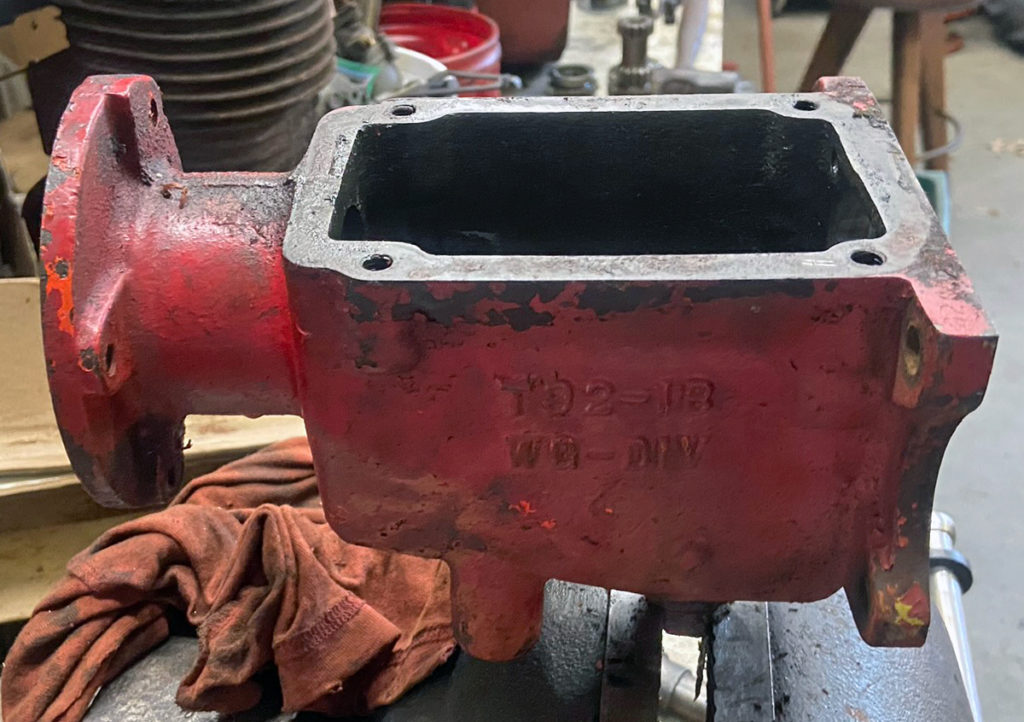
Empty transmission case.
(Photo © Russ Chastain)
Incidentally, this transmission only takes 8 OUNCES of lubricant! And that’s about one inch below the level of the fill plug seen here.
I normally pour in a pre-measured amount of 140w gear lube while the transmission top is off — after reassembly of course.
Well, that’s about it for part one of the T92 Transmission Teardown article.
See also:
— Russ
Great video Russ .I am no to mechanic Kline so may have some one to help me